DIY Solar Bunk End Covers will reduce the temperature inside your PopUp Camper or Hybrid Trailer.
Do you love to go camping in your popup trailer, but the temperature gets too high in the middle of the summer? Make yourself these Solar Bunkend Covers to reflect the heat so you can camp all summer long! You also can quickly make RV Window Solar Shades for a few bucks with supplies from Dollar Tree.
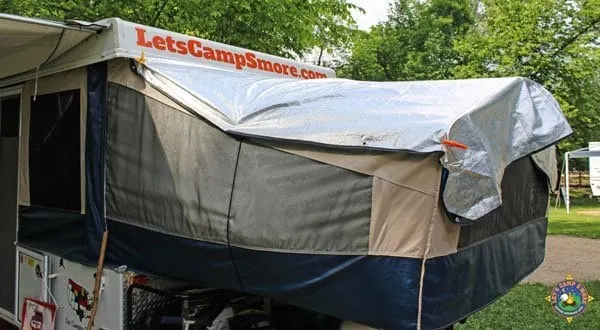
If you hang out in any popup camper circles, a common question is How do I keep my popup cool in the summer? Several people have suggested the use of PopUp Gizmos.
A PopUp Gizmo goes over the canvas ends of a popup or hybrid camper to help keep the RV cooler in the sun. We love the idea and decided to make our own, which saved us over $100 for a set.
If you are not at all handy or crafty, you may want to order some. However, you can follow our easy tutorial below and save yourself a bunch of money!
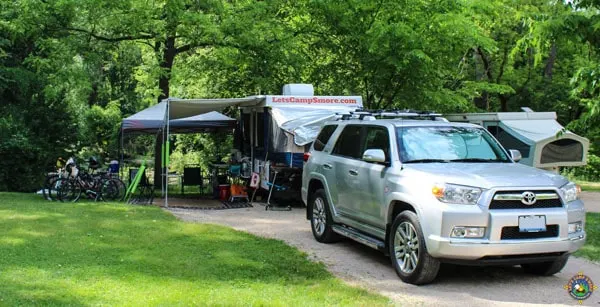
Solar Covers for a Pop-Up Trailer
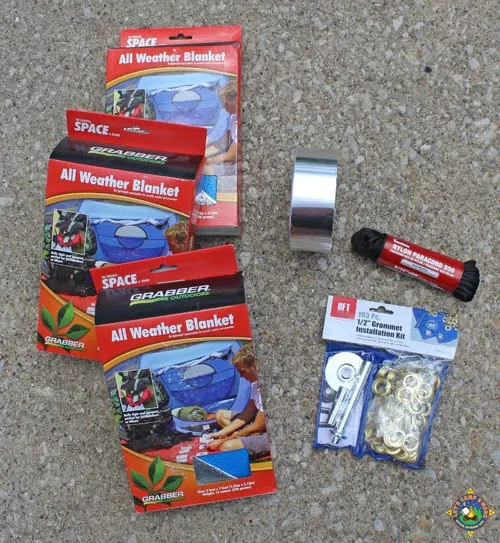
For this project, you will need the following supplies:
- 2-3 Space Blankets (depending on the size of your bunk ends)
- foil-backed tape or duct tape
- grommet kit
- paracord
- clips
- bungee cords
- optional: sticky industrial Velcro
We have put all the supplies together in a list on Amazon.
Bunkend Cover Supplies
 Buy Now →
  Buy Now →
  Buy Now →
  Buy Now →
  Buy Now →
  Buy Now →
  Buy Now →
How to Make Your Own Pop Up Gizmos
Since the bunk ends of our camper are large, we had to piece together 2 solar blankets. We chose to sew these together. If you do not have a sewing machine, you can tape them together, but you might have to retape from time to time.
- Measure your bunk ends to calculate the size of your covers.
- Cut/sew the solar blankets together to create the right size.
- Add grommets to secure cords.
- Optional: add Velcro to secure the cover to your camper.
- Install and keep cool.
How to Install a Thermal Camper Cover
We stuck the adhesive Velcro to the underside of the lip of the front and back of the trailer roof. We used this strong Velcro for this RV Awning Hack.
Just raise the roof a few inches and put the cover in place before raising it the rest of the way. In addition to the cord, you can use clips to secure the cover in place.
We have not used ours in really windy conditions yet, so we’ve only used a few clips and cords.

You can see that the end of our cover is a bit loose. We plan on making some adjustments to that loose end this season.
Solar Bunk End Covers Keep Your Camper Cooler
These thermal covers for pop-up campers really make a big difference in the heat. If we are on a trip moving from campground to campground, we unclip it but leave it velcroed in place and fold it with the bunk end.
Turn the cover over with the silver side down to hold the heat in during cold temperatures.
Other insulated tutorials include our homemade solar cooler cover and campfire reflector.
Give your RV a new look with custom camper curtains that you can see as part of our pop-up camper remodel.

DIY Solar Bunkend Covers

Keep the fold-out bunk ends of your pop-up or hybrid camper cool with these homemade Pop-Up Gizmos.
Materials
- three Space Blankets
- foil-backed tape or duct tape
- grommet kit
- paracord
- clips
- bungee cords
- optional: sticky industrial Velcro
Tools
- scissors
- sewing machine
- mallet
Instructions
Create the Solar Bunkend Covers
- Start by measuring the top of your bunk ends. Our pop-up trailer has a queen on one end and a king on the other. The queen is 84" x 64" and the king is 84" x 74". Since each solar blanket is 84" x 60", we use three blankets.
- We cut one blanket across to create an 84" x 25" piece and an 84" x 35" piece. We could have cut them into smaller pieces but decided to use all of the blanket.

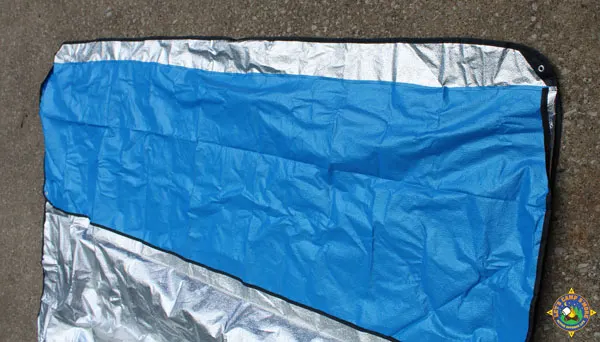
- With solar sides together, stitch a cut piece to a whole blanket.
- Stitch the piece in place about 5" up from the edge as not to stitch over the grommet corners that are already in place.
- Repeat the stitching for the other blanket.
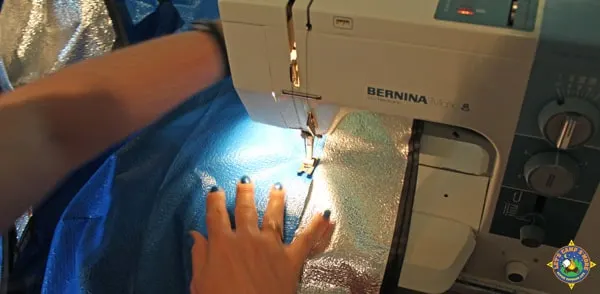
- This is what the stitched blanket cover looks like when stitched in place. It is by no means perfectly straight, but it makes no difference.
- Mark each cover so that you can tell them apart when you go to install.
Add Additional Grommets to your Covers
- Mark where you want to add grommets.
- Use foil or duct tape underneath the grommet for reinforcement. We had foil tape leftover from this project.

- This is what the new grommets look like.

- Attach pieces of paracord to the grommets.
- We used bungee cords underneath our bunkends and measured the length of paracord accordingly.

Attach the Top Edge to Camper with Strong Velcro
- Measure across the inside edge of the camper roof.
- Cut a piece of Sticky Industrial Velcro to that length.
- Attach the thicker side of the Velcro just inside the edge of the roof. It will be stuck to the roof edge, not the canvas.
- Stitch the softer side of the Velcro to the top edge of your bunk-end cover, making sure to center it.
- Repeat steps 1-4 for the other cover/end of the camper.

- Installation: Lift the roof several inches and attach the solar cover to the Velcro. Raise the roof and complete installation with spring clips and paracord.
Notes
Find all the supplies for this project on this Amazon list.
If you don't sew, use the tape to hold the pieces of the solar blanket together. Just make sure you do not have sharp edges that could tear the canvas.
Recommended Products
As an Amazon Associate and member of other affiliate programs, I earn from qualifying purchases.

Chuck
Monday 12th of July 2021
I made this cover from your very detailed instructions and material list. One modification or application I made was on the bunk end. I used two adjustable tent poles that fit into pre-placed grommets, then adjusted the tent poles to hold the solar cover off the canvas, leaving a space for air movement between the two materials. I took the inside temp. with my infrared thermometer with the cover resting on the canvas bunk (per your photo) and a second reading with the air space between the bunk and the solar covering and there was a dramatic difference in the inside temp. Just placing your hand on the underside bunk canvas during both tests, one can feel a difference in temps. the solar blanket does a great job of reflecting, however some heat is absorbed and transferred to the canvas.
Let's Camp S'more
Tuesday 13th of July 2021
Chuck, this is an amazing modification. I'd like to try it, but we no longer have a pop-up. Readers will enjoy this tip. Thanks for sharing.
Lilli
Saturday 12th of June 2021
Thank you for this. Hope to do this tomorrow for 4 day camping in the mudwest heat next weekend. Im curiois why you didnt just put velcro on the other end of the bunk canvas versus using gromets and bungle cord?
Let's Camp S'more
Monday 14th of June 2021
2 reasons: We wanted it to be secure in the wind & we didn't want to put velcro on the canvas.
It sure was HOT this weekend in the Midwest. We no longer have a pop-up, but I spent Saturday cutting Reflectix to cover windows in our RV and it made a HUGE difference.
Nathaniel
Saturday 26th of December 2020
Does this insulate in the winter like the others?
Let's Camp S'more
Sunday 3rd of January 2021
Flip it over in the winter to hold warmth in.
Joanne
Thursday 22nd of October 2020
I’m going to be helping my son with this project. Re the sewing, what size needle did you use, what kind of thread, and what stitch length to sew the solar blankets together? Thanks for sharing your ingenuity. Joanne
Let's Camp S'more
Thursday 22nd of October 2020
Joanne, I think I used a size 14 needle with a wider stitch. I always use all-purpose thread. Good luck!
Mzubie
Monday 28th of September 2020
Can this help with rain water? We have scotch guard the canvas as much as possible, but still collect some water under the beds. This was after a constant rain we experienced for two straight days in Cloudland Canyon GA. It appeared to have come from the leather portion of the popout.
Let's Camp S'more
Wednesday 30th of September 2020
I think it will be effective if you have the top edge attached underneath the roof edge with velcro. I just updated the post with instructions on how to do this and included a photo. Stay dry!